

Foilkites ABC ja Z
- Joni Sarola

- Apr 26, 2024
- 4 min read
We are often asked for help in maintaining foilkites and sometimes the buyer of a used kite does not even know how the foilkite should behave. Below we tell you how to get your Flysurfer foilkite flying like new, or at least close to it.
The purpose of this article is to help trim the Flysurfer foilkite properly. Using LMT (long mixer test). Available atleast in the following models: Flysurfer Soul, Soul V2, Sonic3 and Sonic4
If your kite can't be found in the list above, it's still worth reading, because at the end there's a bit more about other foilkites also.
Foilkites are wonderful machines when they are adjusted properly. They are usually good for going upwind, fly in low winds and are often great for boosting & hangtime, depending on the model.
On the downside, old foilkite where the bridles have shrunk are often sensitive, e.g. for stalling, flapping & collapsing of wingtips and many other phenomena that can make the kite difficult to use and significantly affect performance.
Flysurfer foilkites you can find A,B,C & Z row of lines, excluding VMG model.
A = row closest to the front edge (LE) of the kite. A is always constant and does not change.
B = Found immediately below the A lineup
C = Below B row & above Z row.
Z = Brake line row which can be found at the bottom edge (TE) of the kite. By tightening the Z line, (Moving control bar) affects the kite's profile. Tightening the Z also adjusts the C and B lines with the help of the mixer, keeping the shape of the kite and the angle of attack, AOA optimal.

These lines branch off into smaller sub-areas and from there to the mixer and from there to the control bar.
As a general rule of thumb the bridles of kite & mixer will shrink when time passes on, and the biggest shrinkage occurs in the mixer (C and B pulleylines). Likewise, the pulleys wear out and start to wobble, this accelerates the wear of the line. These replacement lines come with the kite and it is good to change them from time to time.
The shrinkage of the lines can be uneven, and sometimes lines may have shrunk so much that adjusting the mixer does not produce the desired end result. In this case, the new bridles make an otherwise good kite like new again.
Flysurfer has developed a good & easy way to include the wear/shrinkage of the bridles in the mixer adjustment. The LMT (long mixer test), which can be used to compensate for the shrinkage of the bridles
Flysurfer Soul, Soul V2, Sonic3, Sonic4
NOW STAY FOCUSED
HOX: First make sure that all your control bar lines are equal lenghts as they should be.
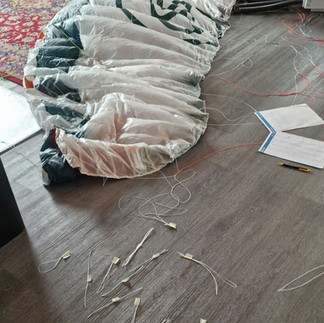
Open the kite (or half of it), remove the bar if attached. Clear the mixer and the bridles straight from the wing tip to the side and connect the kite Back & frontmain lines to the trimming tool (or 2 screwdrivers slightly apart from each other.)
Take the A and Z line bridles near the center of the kite (black markings on the bridles) in your hands.
Make sure that A and Z are in the same level (knots, NOT markings) and lock the trimming tool with a 5kg pull.
You can lower the A or Z bridle to the ground (it doesn't matter which one, because you have set the knots at the same level. Make sure that setting is not lost during the adjustments.
Let's imagine that you put a Z-line on the ground. Now take turns comparing the C and B lines (the ones with markings) to the A line. Pull with a force of 5 kg (important) while also keeping pressure on the A string. If the knots in the lines aren't in same level, go to the mixer and adjust the loop next to the pulley either longer or shorter. Always adjust C before B, because B moves half the distance you adjust the C line.
In the adjustment of the mixer, by reducing the loop lenght by 2cm, the string becomes longer by 1cm, i.e. 2:1. After the adjustment, it is very important to tighten the pulley loop that you just adjusted, with about 30 kg of force, so that the adjustments do not change when you launch your kite next time.
Finally, view all knots A,B,C and Z from the line to the same level. (with 5kg force) Repeat the same on the other side.
Go fly it, because it's the best way to make sure the kite works.


If you change parts, such as the yellow spare part strings, always make the adjustments again.
If the bridles are really worn, or the kite otherwise does not meet your expectations, you can overcompensate for trimming. For example, if the kite became too unstable, shorten the C and B lines. However, B always less than C.
If you own a kite that does not have a long mixer test (sonic2, Sonic fr, other brands, etc.), then a short mixer test will hardly make the old kite fly like a dream, but you will have to overcompensate for a short mixer trim in the direction you want. In old kites, it may be reasonable to measure a few bridles from the Z-line for example, and if necessary think about whether to replace the bridles completely, or whether to get a new kite from us.
If you are unsure, call or send us an email, we will be happy to help you out.
By the way, Kites purchased through us include the trimming of the kite free of charge one year after the date of purchase. Take advantage of it 🙂
Old kites for which no long mixer test can be performed, are improved by changing spare parts lines & pulleys and then trimming, test flying and trimming after flying. Sometimes it can be that you can't get any good out of a kite without changing the all bridles.


Comments